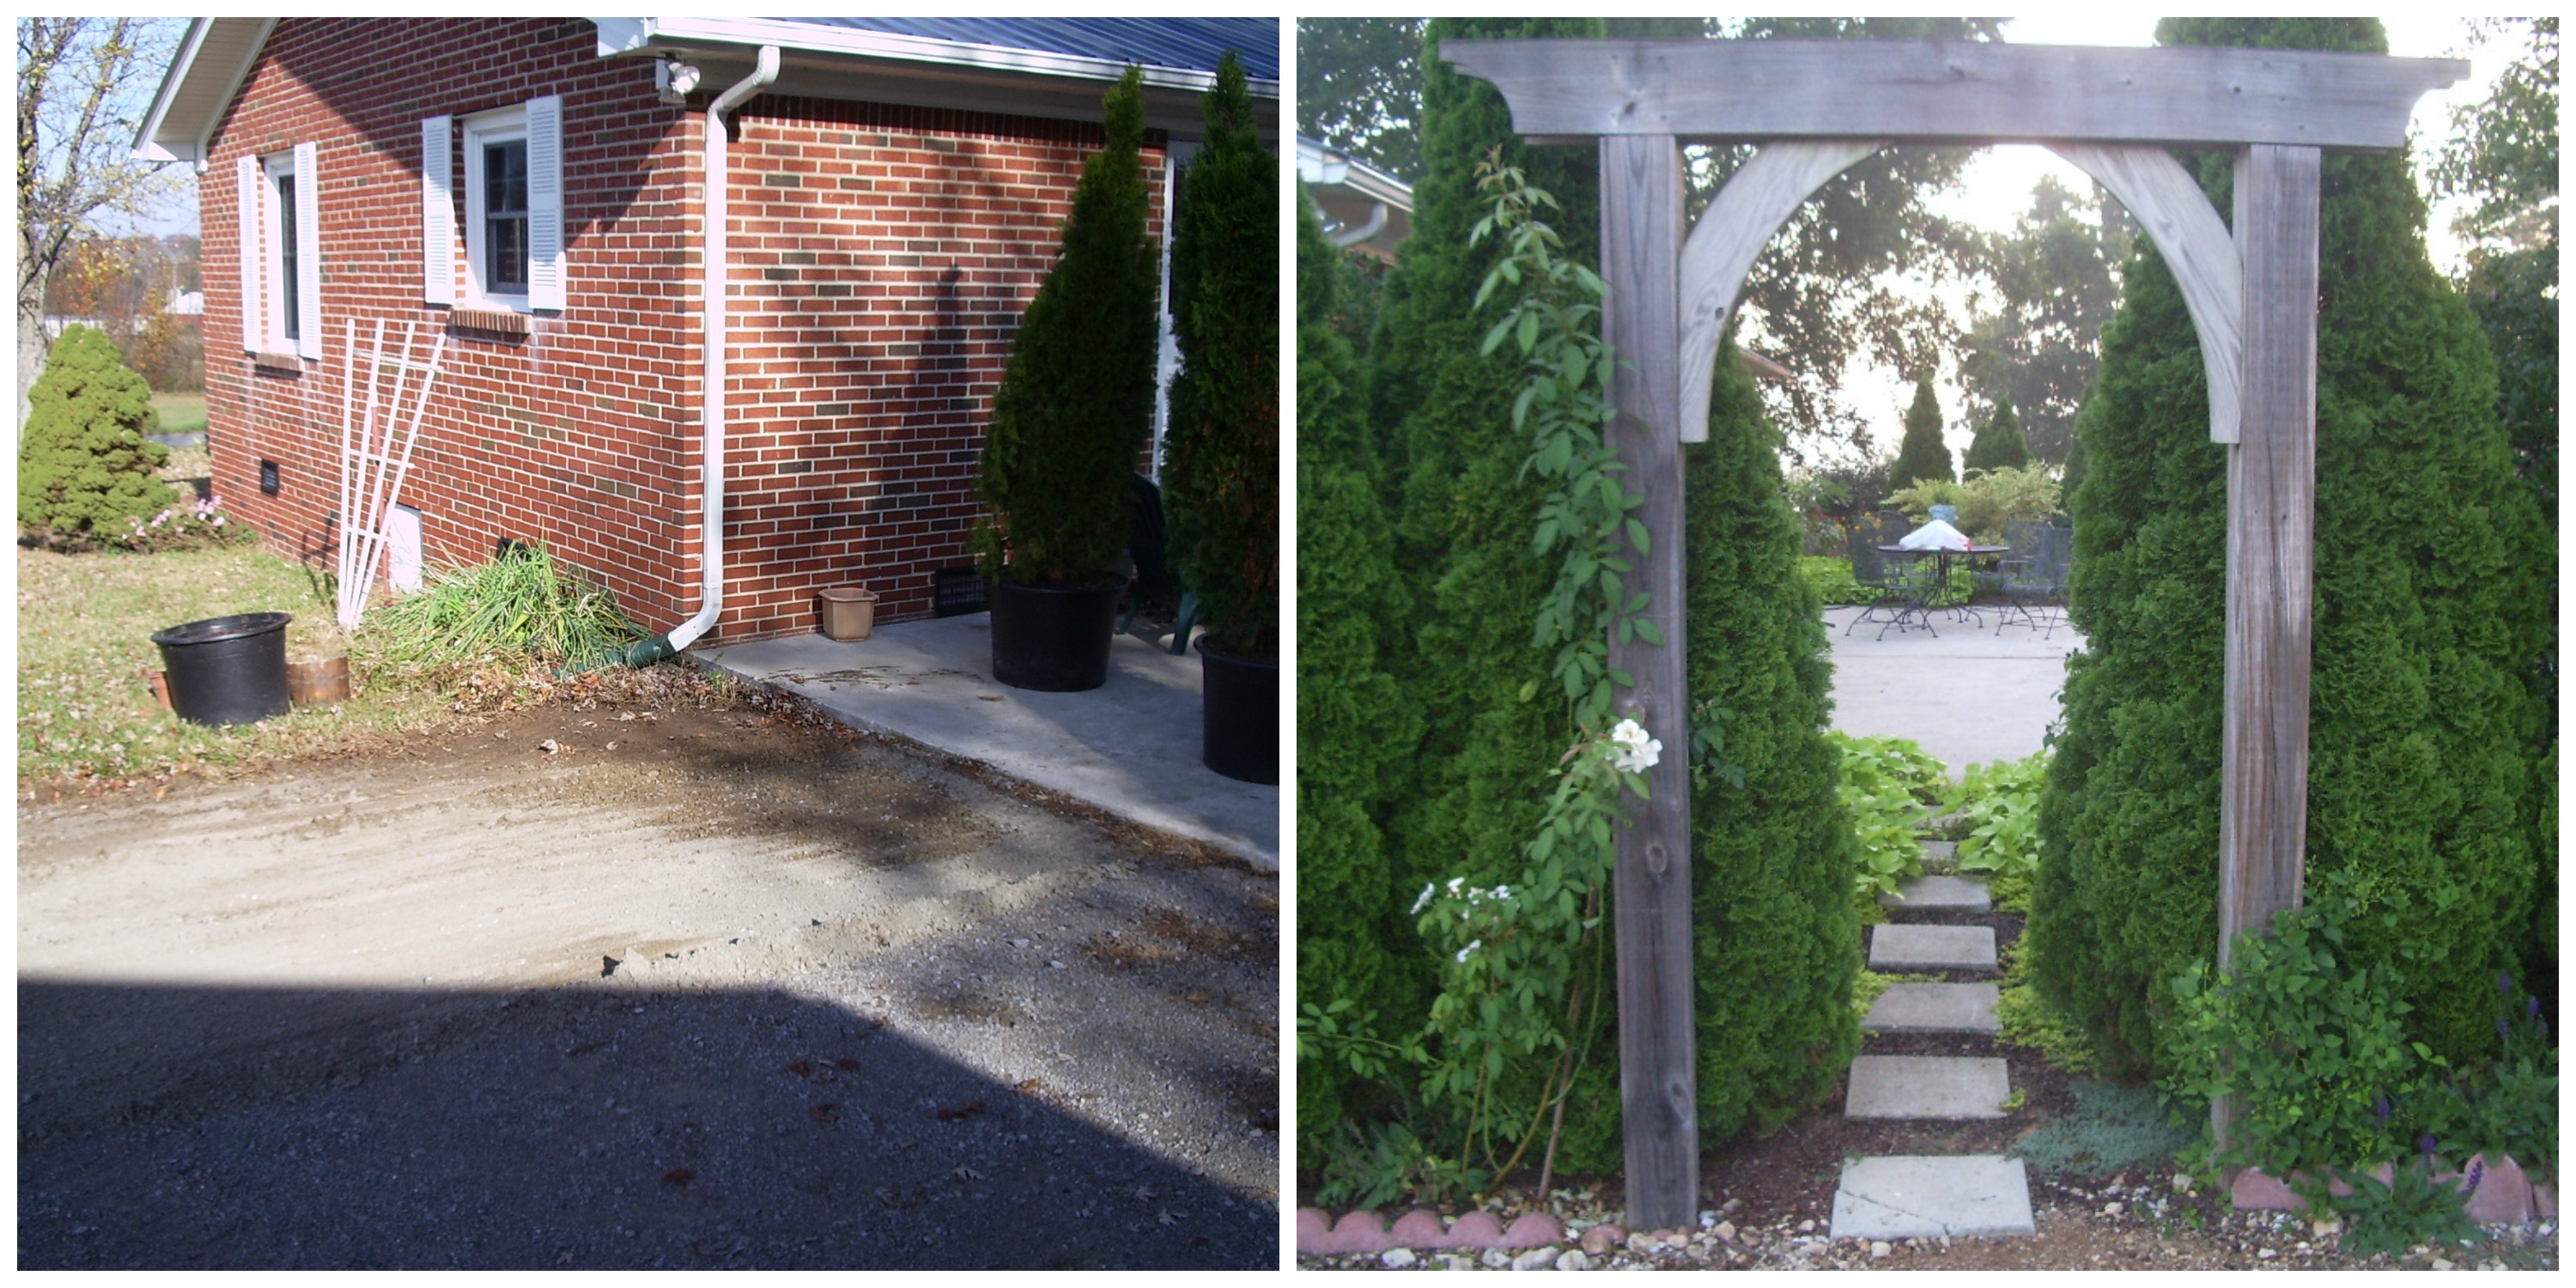
This patio needs privacy for entertainment and sunbathing. Before and after five years later.
It’s Saturday morning, the sun is shining, and the temperature is perfect. What would you be doing right now in your outdoor space?
Relaxing? That’s a great idea.
Pulling weeds from your raised beds or admiring your organic veggies? Ok, plan for a sunny spot!
Walk around your current landscape and visualize your paradise. Don’t make this HUGE decision in the moment!
Look outside through your windows. What do you WANT to see? Remember, your landscape will change through the seasons. (The evergreens stay the same, but deciduous plants will lose their leaves).
Weekend Warrior
Do you love a green grass lawn or do you want to remove the turf so there is less weekly work?
- If you want lawn, design your future planting beds so you can easily mow around them. Pick shapes like circles and half moons.
- If you have children or want to entertain large groups of people, it’s a good idea to keep some lawn, especially in your front yard. Or consider a patio made from stone, brick, or concrete.
Nosy Neighbors Nearby?
Do you need privacy screening?
- Install evergreen trees like Arborvitae (Thuja) or Holly(Ilex).
- Space the plants according to the plant tags so they will grow together more quickly, making a privacy hedge.
Organic Edible Landscaping

Raised Beds for Edible Landscaping Before and After
- Consider evergreen plants and raised beds or containers. Line is a design principle. Evergreens and raised beds give strong straight edges that frame your outdoor space.
- You must have 6+ hours of direct sunlight. That means the southern side of your home is best. West is good too.
- Perennials like rosemary, parsley, oregano, and mint are easy to maintain and live for years!
- Basil is a great choice for your first edible. It loves the heat of summer.
Professional Layout Process
This is my personal process for initial layout (after walking the property).
- Use flags on metal stakes to arrange the location of beds and plants. Or use a garden hose to create bed shapes. Or place new plants in their pots if you’ve already bought them. Move things around.
- Install plants of various sizes in groups of odd numbers. Odd numbers create a center plant that will be the focal point for they eye.
- Triangles (formed by three plants) are patterns that please the eye. Make the distances unmatched if using informal style design. Groups of three never go out of style
- Start with small plants or a small area of your landscape the first year. It’s easy to get overwhelmed. I recommend starting with the foundation of your home. Plant evergreen shrubs around the foundation. This is pleasing to the eye and the shrubs will be near a water hose for easy care giving.
- Plant choices are based on sun exposure and your cold hardiness zone. Ask your local garden center for plant recommendations, as well. Don’t forget to read the plant tags when shopping.
- Looking for energy savings? Plant a deciduous shade tree on the south western side of the home for summer time shade. The tree will provide cooling shade in the Summer and allow light and radiant heat to enter your home in the Winter because the leaves will be off.
Do you have your vision? This helps frame your budget in Step 2.